Hi,
Today I encountered an issue where the storage/log partition of my vCenter Server was full.
I resolved the problem by following these instructions:
To Increase the Disk Space:
- Power off the vCenter Server VM. If the VM is inaccessible, perform this step
from the ESXi host level. - Right-click the VM.
- Click Edit Settings.
- Select Virtual Disk.
- Increase the size of the disk, ensuring there are no snapshots attached to the VM.
- Power on the VM.
- Use the BASH Shell or Appliance Management CLI to expand the partition(s).
Increase Disk Space Using the BASH Shell:
- Log in to the vCenter Server Appliance using SSH with root credentials.
- Run the following command to enable the Bash shell:
shell.set --enabled true
3. Type shell and press Enter.
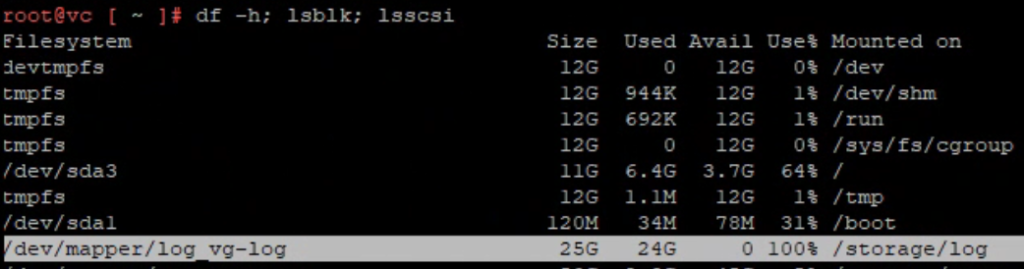
4. Use the following commands to identify which disk is experiencing capacity
issues and find its corresponding SCSI ID, as shown in the VM edit settings:
df -h; lsblk; lsscsi
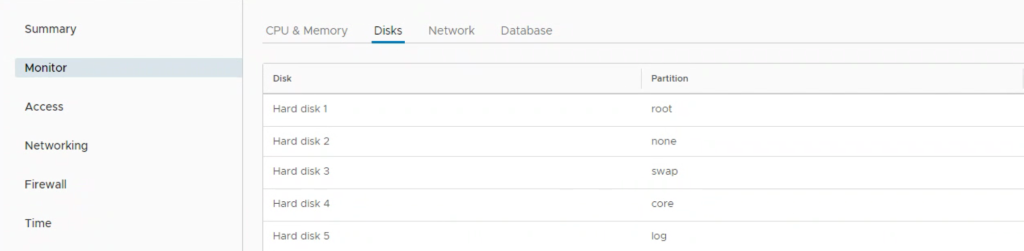
5. You can also verify the affected disk using the VAMI interface:
Navigate to https://vcenter:5480 → Monitor → Disks, where you can find the Hard Disk number that needs to be increased.
Navigate to https://vcenter:5480 → Monitor → Disks, where you can find the Hard Disk number that needs to be increased.
6. Using the vSphere Client or vSphere Web Client, locate the vCenter Server Appliance virtual machine and increase the disk space for the affected virtual disk.
7. After increasing the virtual disk size, return to the SSH session and run the following command to automatically expand any logical volumes for which the physical volumes have been increased:
/usr/lib/applmgmt/support/scripts/autogrow.sh
8. Run the following command to confirm that the virtual disk has successfully expanded:
df -h; lsblk; lsscsi
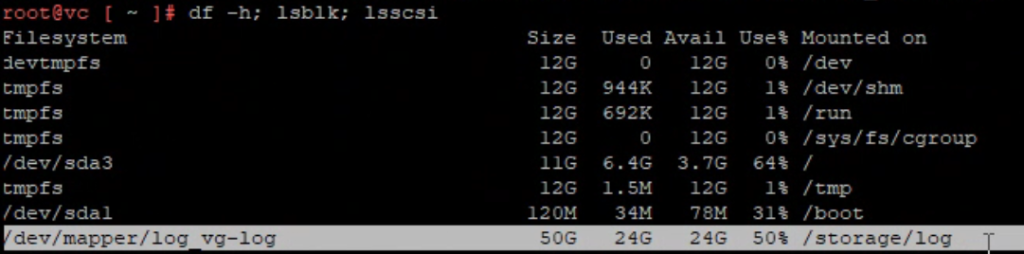
9. You can verify the expanded disk space through the VAMI interface.
Finish 🙂